
Onesie Neckline
The Onesie Neckline Join
This neckline is featured in a few different patterns including Baby Tee (from New Girl). The photos below are also included in the New Girl Booklet. This neckline join is a bit fiddly to perform but once you get it, it is very satisfying and so great for babies and toddlers. I hope seeing these photos will help to clarify any questions!
I am using two different colors for the front and back to make sure you can see what is going on and how you should be holding your pieces. The green is the Back and while the off white is the Front. Note that this tutorial begins after the Left and Right Fronts are joined together as that section is fairly straightforward and I have not gotten any questions about that section. Also note that there is no edging on these pieces since that treatment is handled differently depending on the design. If you are working the Baby Tee, you should have completed your collar ribbing before performing this join in order to minimize stretching. For Swaddle Smock, the edging is crocheted on during finishing.

Get to know your pieces: the back should still be on circular needles while the sts from the front were placed onto two DPNs after the Left and Front were joined. The DPNs are labeled according to when the sts were slipped on to them; DPN 2 will actually be used first during the join.

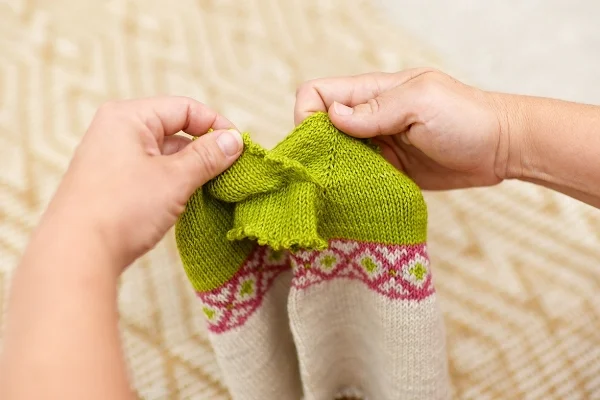
Next, line things up for the first join. You'll be holding two needles together in a similar fashion as for a 3-needle bind-off. Hold the circular needle with the sts from the Back on top of DPN 2. You will be starting at the very beginning of the RS row for the Back sts and working with the last sts when facing the RS of the Front.

Your working needle for the join is the circular needle, NOT DPN 1. Ignore DPN 1, and insert your circular needle into the first st from the Back and the first stitch from DPN 2 all at once, then knit these 2 sts together, placing the new stitch onto your circular needle.

Above shows the completed join of the Back with Front sts from DPN 2. This section is the Left Sleeve with one raglan st on either side. The next step is to continue knitting across the Back sts to get to the location of the second part of the join.

Now, all that's left to do is to get DPN 1 in place and perform the exact same join as you did to create the Left Sleeve overlap. Make sure that you undo any twisting of your fabric or sts on DPN 1 before you get set, as you will not be able to fix that after your join. Layer the Back on top of the DPN 1 Front sts just as for the first join. You will be working with the sts at the very beginning of the RS row for the Front sts and working with the last sts when facing the RS of the Back.

And voila! Once you knit 2 together through all of your Back sts, your join is complete. To finish up, continue knitting the remaining Front sts onto your circular needle.

Take a deep breath, the "hard" part is over :) Now you have an accommodating neckline with no fear of whether it will slip on and off easily.
Above is Swaddle Smock all finished up, and below is Baby Tee. Cute AND functional... a Tot Toppers goal achieved.

Enjoyed this tutorial? Consider making a donation to help me continue to create tutorials for knitters! Thank you SO much.